
Kyocera ECOSYS M2040dn blurred image or blurred text
Applies to: Kyocera ECOSYS M2040dn, Kyocera ECOSYS M2135dn, Kyocera ECOSYS M2635dn, Kyocera ECOSYS M2635dw, Kyocera ECOSYS M2735dw, Kyocera ECOSYS M2540dn, Kyocera ECOSYS M2540dw, Kyocera ECOSYS M2640idw
Quick answer
Blurred output on a Kyocera ECOSYS M2040dn often comes from condensation or damp paper. Print the Test Page from Service Setting. If only copies are blurred, flatten the original and let any condensation on the glass clear. If prints are blurred, change to dry paper first, then a technician runs Drum Refresh and checks the LSU glass.
What is happening?
A soft, fuzzy image on copies can come from a wavy original, condensation on the glass or scanner lens, or originals that do not move smoothly through the document processor. Blurred or doubled characters on prints point to damp or unsuitable paper, the media type setting, the paper drive, the conveying guide, the fuser, condensation on the drum or a dirty LSU glass. On scans sent in colour, the same document processor checks cover colour shift. The same checks apply to all eight models in this service manual.
What causes it?
Original and condensation
A wavy original, or condensation on the slit glass, contact glass, DPCIS glass or scanner lens.
Document processor feeding
Originals outside the spec, a bent leading edge, dirty DP conveying rollers A and B, pulleys not turning, loose drive parts, a bent DP scanning guide, a loosely mounted DP or a faulty DP hinge.
Scanner adjustment or carriage
U411 not done, foreign matter on the ISU shaft, a badly fitted scanner carriage, or a loose scanner drive belt.
Paper (engine)
Damp paper, paper outside the spec, or the wrong media type.
Drive, guide and fuser (engine)
Main motor drive not turning smoothly, a bent conveying guide, or a bent fuser front guide or uneven fuser pressure.
Drum and LSU (engine)
Condensation on the drum, a dirty or aged LSU glass, or for side shift a faulty LSU or main/engine PWB link.
What can you check yourself?
- 1
Print the test page
Go to System Menu > Adjustment/Maintenance > Service Setting and print the Test Page (a grey halftone sheet). If the fault is on the test page, the printing engine is the cause. If the test page is clean and only copies or scans show it, the scanner is the cause.
- 2
Flatten the original
Smooth out a wavy or bent original, or use another copy, and use originals within the spec for the document processor.
- 3
Let condensation clear
If you see condensation (misting) on the glass, let it clear before you copy again.
- 4
Use dry paper and the right media type
Load dry paper from a sealed pack and set the matching media type in the System Menu.
Steps for a technician
- 1
Isolate scanner or engine
Print the Test Page from Service Setting. A fault on the test page is an engine factor; a clean test page means a scanner factor. A fault that scales with zoom copying is also a scanner factor. On the scanner side, check whether it follows the contact glass, the DP front side (main unit CIS) or the DP back side (DPCIS, 40 ppm models only).
- 2
Condensation and original
Remove condensation from the slit glass, contact glass, DPCIS glass and scanner lens. Run U411 [DP FU(Chart B)], [Table(ChartA)] or [DP FD(ChartA)] as fits the path.
- 3
Document processor
Clean DP conveying rollers A and B and their bushings. Refit conveying pulleys A and B with their press spring and the DP drive parts. Replace a bent DP scanning guide. Check the DP sits right and retighten its screws. Replace the DP hinges if the DP does not hold open.
- 4
DP back side (40 ppm models)
Fix the front side first. Refit conveying rollers A and B so originals touch them, and refit the DPCIS so originals pass close to its glass. Clean, refit or replace the DPCIS glass if it is dirty, bent or scratched.
- 5
Contact glass path
Clear foreign matter off the ISU shaft, refit the scanner carriage and refit the scanner drive belt. Replace the scanner carriage if the CIS is faulty.
- 6
Paper and drive (engine)
Replace damp or unsuitable paper and set the media type. Grease the drive gears if the main motor drive is not smooth. Replace a bent conveying guide.
- 7
Fuser
Fit a new fuser unit if its front guide is bent or it presses unevenly.
- 8
Drum and LSU
Run Drum Refresh for condensation. Clean the LSU glass; replace the LSU if the glass has aged. For side shift, replace the LSU, or reseat the main/engine PWB connectors and replace the board.
Parts for this error
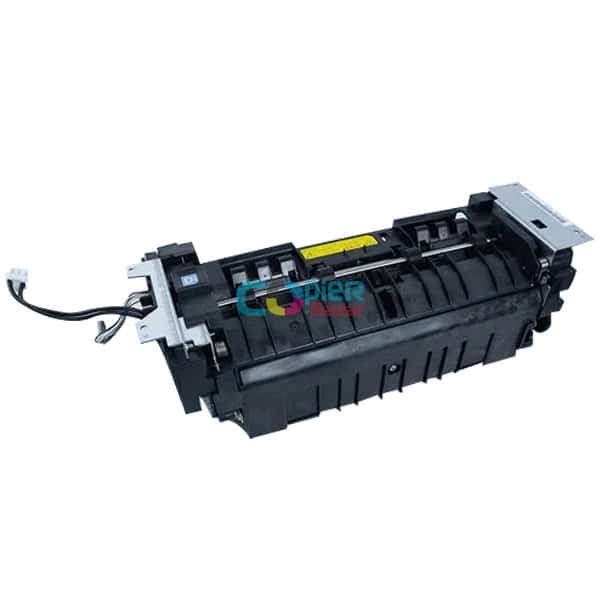
Fuser unit
Only if the check in step 7 finds a bent fuser front guide or uneven fuser pressure. The manual's measure is a complete fuser unit (the store calls it the fixing unit).
When should you call a technician?
Call a technician if blurring stays after using dry paper, flattening the original and letting condensation clear.
Questions people ask
- Why are my Kyocera M2040dn prints blurred?
- Damp paper is the first cause in the Kyocera service manual. Use dry paper and the right media type. If prints stay blurred, a technician checks for condensation on the drum, the LSU glass and the fuser.
- Why are copies blurry from the document feeder only?
- The manual checks the original, condensation on the slit glass and the document processor's rollers, pulleys, guide and mounting. Glass copies use a different path.
- Does blurred text mean a bad fuser on Kyocera M2040dn?
- Only in some cases. The manual replaces the fuser unit for blurred characters when its front guide is bent or its pressure is uneven, after checking paper, media type, drive gears and the conveying guide.